Anthro-Inspired Franken-Pants: A #sewfancypants Win
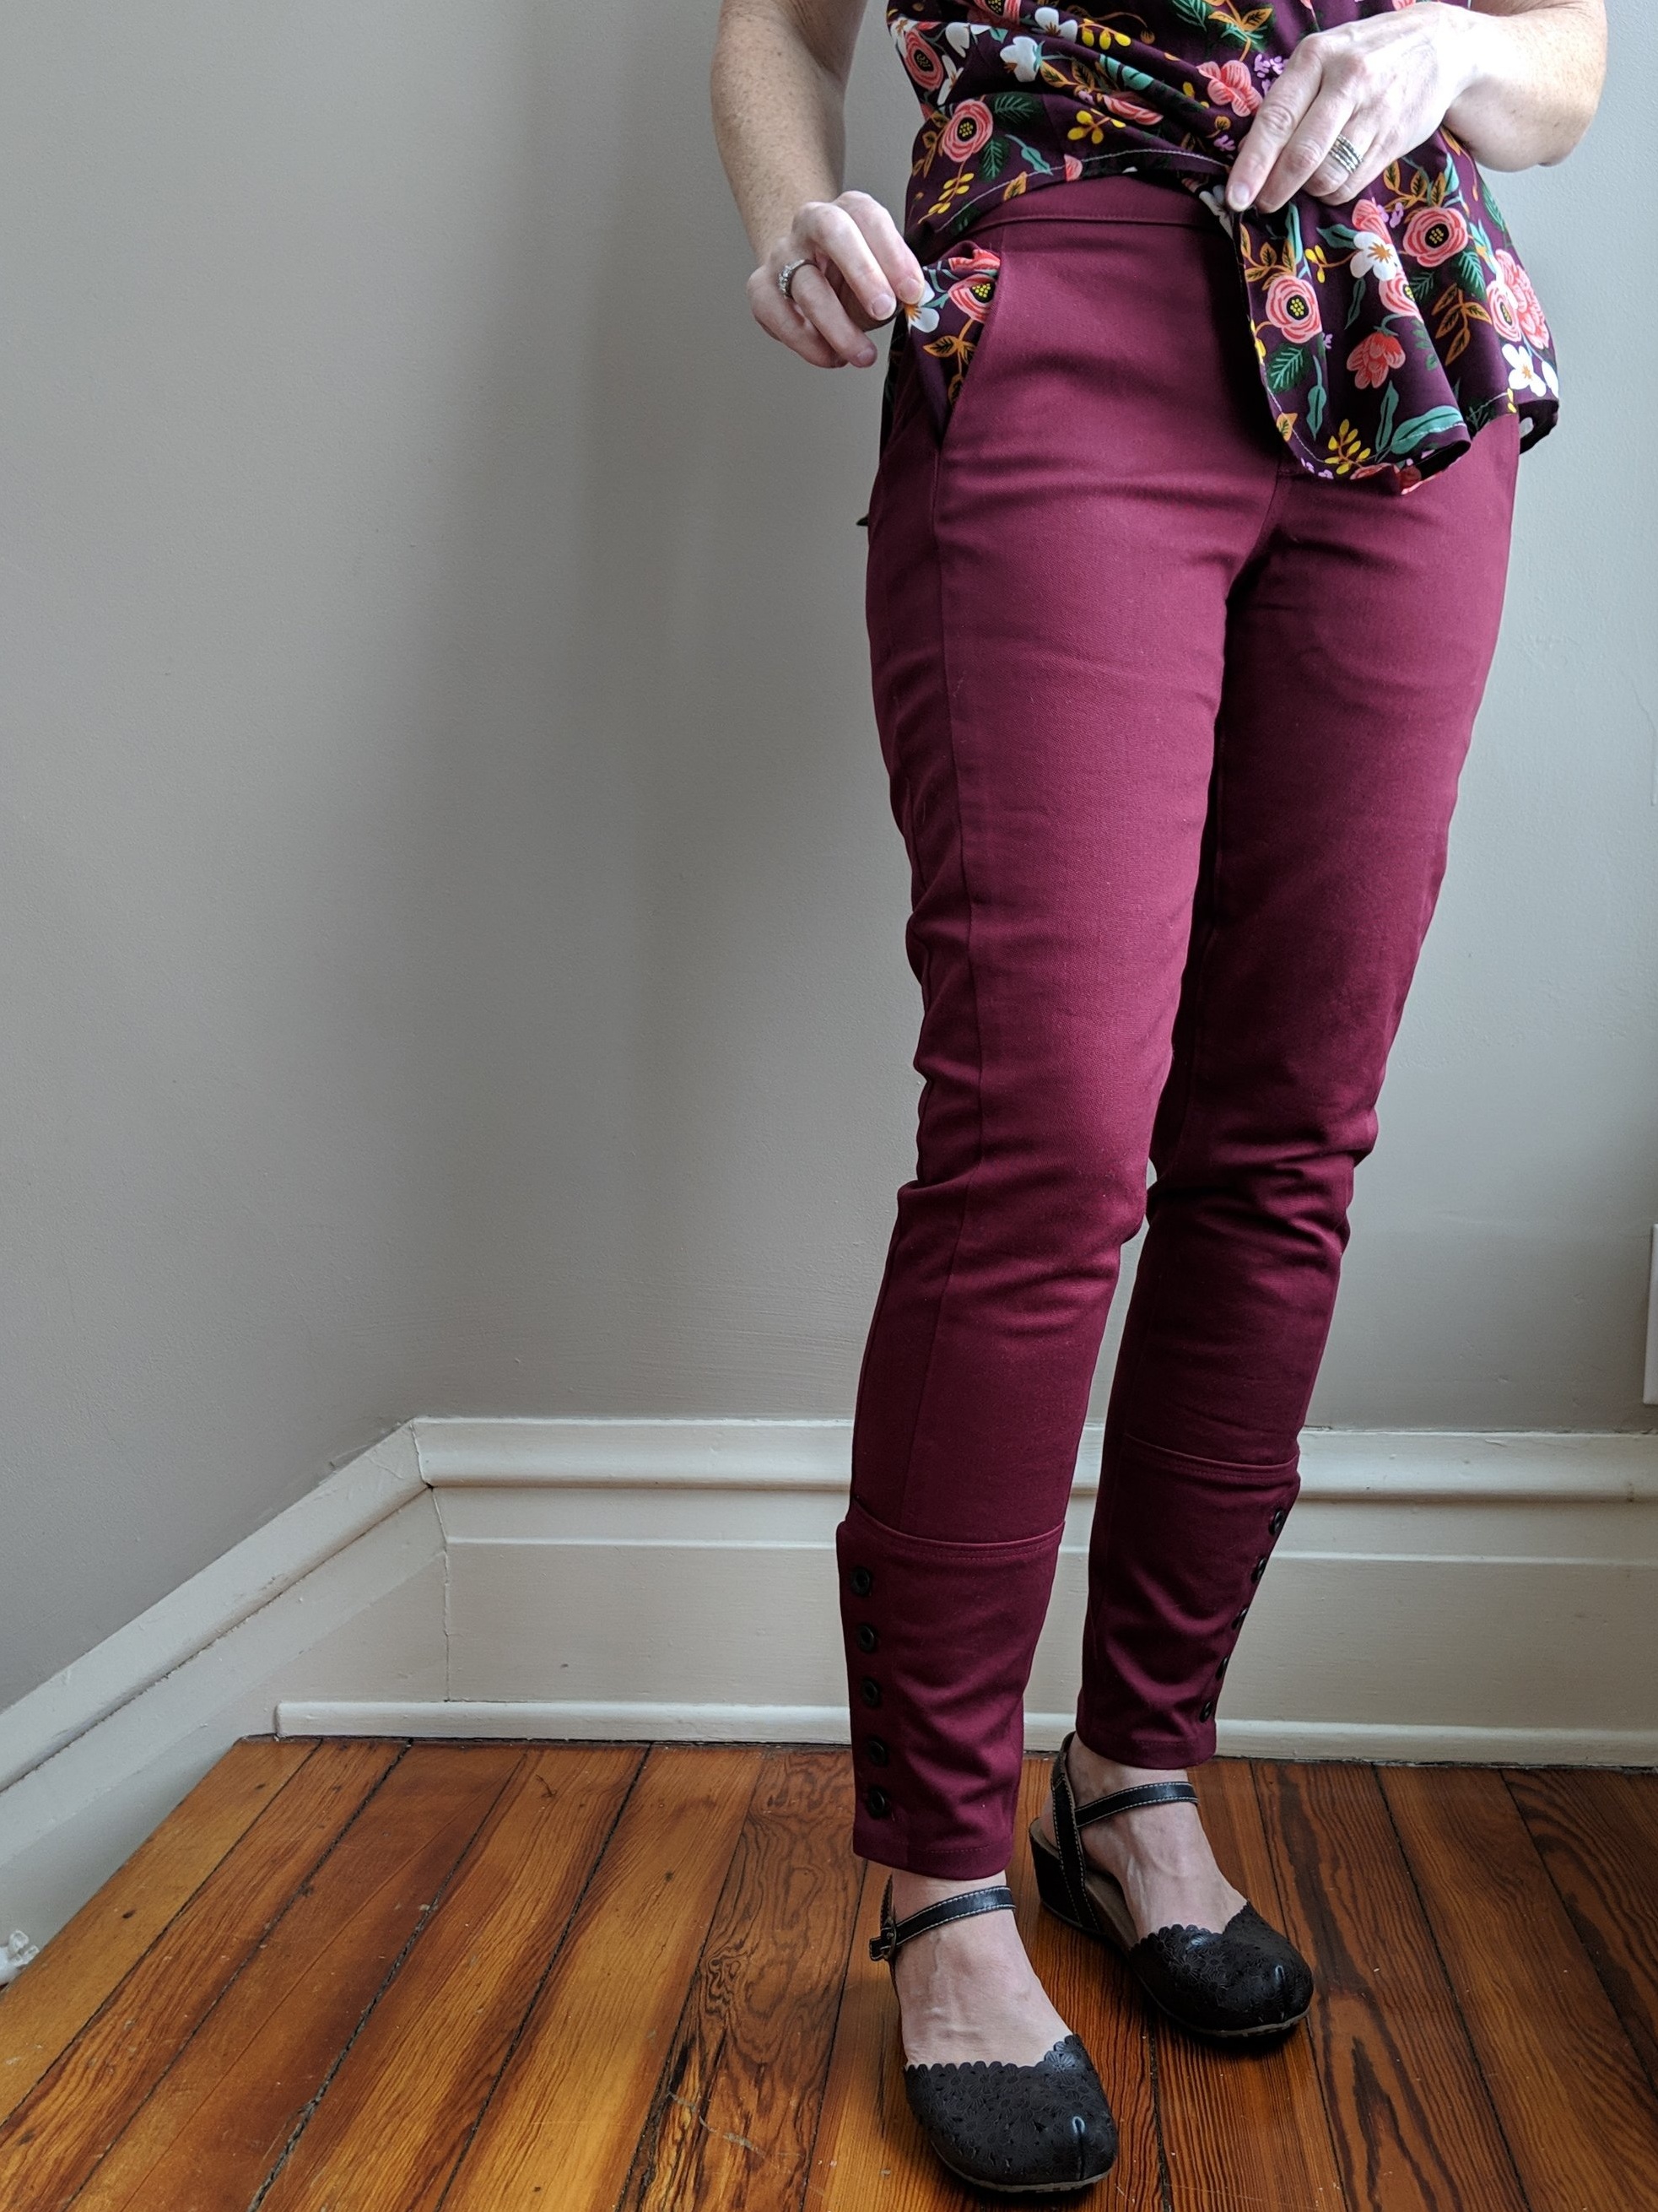
At some point in November (2018) I came across these pants on the interwebs. I instantly fell in love with the style lines and wanted to recreate them in the wine color.
The ankle button tab detail! Squee!
So I purchased the cardinal stretch chino twill offered by La Mercerie during Jess’ Black Friday Sale.
After sewing both the Liana Stretch Jeans by Itch to Stitch and the Narcisse Pants by Deer and Doe for Sew Fancy Pants, I knew I wanted to combine aspects of both patterns to achieve the ready to wear pants of my dreams.
[Itch to Stitch and Deer and Doe were both sponsors for the Sew Fancy Pants Instagram event. I purchased the Liana pattern from UpCraft Club with my monthly credit (I have a month-to-month account) and I received the Narcisse pattern for free.]
The back of the pants are 90% Liana. I laid the Liana back pattern piece over the back of the Bryce cargo pattern (which I had also previously sewn) to eliminate the yoke.
(It’s come to my attention since winging this my own way, that there are posts out there (for example) about switching out a pattern with a yoke for one with darts, but I went the mashing route with 2 of my tried and true patterns.)
I used the patch pocket markings from Bryce to situate the welts from Narcisse and used all the back welt pocket pattern pieces and instructions from Narcisse.
The front of my pants are also about 80% (I’m making these numbers up as I go along) Liana with a touch of Narcisse. I knew from my muslin of Liana that I would cut the front of the pants 10” up from the original hem to create the lower front vented panel. I took 2” off from the original side seam to make the side seam panel that would give birth to the front inseam pockets a la Narcisse.
And here is where I made a mistake I frequently make when altering patterns. I cut my new side panel 2 1/2” (width plus seam allowance x 1) wide instead of 3” wide (width plus seam allowance x 2). Thankfully the 1/2” seam allowance was enough that I could sew the fronts with 1/4” seam allowances and not end up with a pair of pants a size too small.
So anyway! The front pockets are basically inseam pockets. They sit on the seam I created between the front of the pants and the 2” wide side panel. This general approach was borrowed from Narcisse.
And the pockets are enormous! After all was said and done, the left pocket was too wide and overlapped with the front fly too much, so I trimmed it down.
Sorry this photo is too purple. White balance is for people who know what they are doing. That’s obviously not me.
This was after I removed about 3” from the top of the Narcisse front pocket pattern piece! The rise on Narcisse is higher than Liana and I just guestimated how big I would want these to be by holding the pattern piece up to my body. If I were to do it over again, I would adapt the Liana pocket stays to be compatible with an inseam construction.
Since the fly isn’t stabilized by the pockets in my pants, I interfaced the fly extensions.
The lower front panel was the bottom 10 1/2” of the original Liana front. I attached it to the assembled upper front and top stitched the seam. When I closed the side seams, I simply stopped at the level of the bottom panel.
I removed an inch from length at the hem so they would finish at the ankle (I am 5’ 5” tall). I also slimmed the width of both the front and back at the vent, tapering from 1” wide at the hem to nothing at the top of the vent. (I wear a size 7 shoe and this was perfect for me, but you ought to do some foot and ankle measurements if you want to be able to keep the buttons closed while taking the pants on and off. It wouldn’t be the worst thing in the world to have to open and closed the buttons, but I don’t have time for that myself!
Now comes the creative part for creating the button placket/vent feature. I polled my IG followers and mulled it over quite a bit. Folks either said they would approach it as a button fly a la Landers or they would bind the seam a la Brunswick. I don’t own the Lander pants pattern and was familiar with Brunswick having recently tested that pattern, so I went with that method.
I sewed the hem before adding the binding. My pattern piece for the binding was 4” wide by 18” (2” finished width plus seam allowance x 2 by (vent height x 2) plus (seam allowance x 2)). I hope I’m making sense! I wish I had some simple illustration skillz. I just don’t!
Then they just needed a shit ton of buttons. Lucky for me, I’m a glutton and had ordered a bucket load from my favorite jeans button peddler, Citron Jeans, about 10 days prior.
These are 14mm buttons, so I used 2 for the waistband.
Five on each ankle vent.
And 1 for each of the welts.
So 14 buttons and holes! Weee!
The end of my story is simply that I love these pants. I think they turned out pretty damn amazing.
And my pocket bags match my Rifle Paper Co. rayon Trevi top (which I made last summer)! Kudos to that Clever gal, Colleen, for telling me to pair these 2 garments together.
And they look great with my new Keds!
I’m always happy to talk shop if you have any questions or comments. Thanks for reading!


